Showing posts with label crochet. Show all posts

Tuesday, April 19, 2011

Grin and Bear It

What's better than a good teddy bear?  So cute, always ready for a big hug, good at keeping your secrets, they love you unconditionally and forever.  Let's celebrate teddy!
Here are some teddy bear fun facts:

I recently completed my latest bear project - Ming Panda.  He's a peaceful little guy and has been entrusted to my son, who loves him already.  I made a pink and white one, too, for my daughter (she named her Belly).  I'm thinking a great big one would be fun to make.  Maybe someday...
Without further ado, here is Ming:

He's available now on Etsy and Ravelry

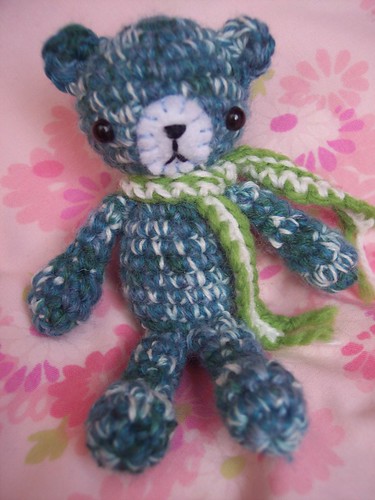
And here are some more little bears for your crocheting enjoyment:


Thank you designers, for the great patterns!

Long live teddy bears!!

Monday, April 18, 2011

Amigurumi Unite!


One thing that can make or break an amigurumi is the way it has been joined together and finished.
So much can go wrong...  One arm flapping listlessly on a loose seam, one leg jutting akimbo on stitches so tight that the yarn is puckering, missed and protruding stitches, tottering heads, lumpy tummies, stuffing showing through gaping stitch holes, woven loose ends peeking out, the list goes on and on.


The most important piece of advice is to take your time!  Plan what you need to do.  Read (and reread) your pattern.  If you don't know how to do something, don't guess - look it up!  And then, when you're ready, go slow.  Be precise and neat.


The second most important thing to remember is don't be afraid to try again!  You can undo and redo stitches as many times as you need to until you get it right.  Frog it!  Have you heard the term?  Just rip it, rip it, rip it - pull those stitches right out and try again!  Just don't forget to not weave in any loose ends until you know you're happy with what you've done (doing so makes it harder, though not impossible, to go back and fix mistakes).


Here are some more useful tidbits:
  • Amigurumi should have fairly tight stitches, so that the stuffing won't show through.  If you notice holes in your work, use a smaller hook and/or thicker yarn.
  • Even the best fiberfill stuffing can be lumpy if it isn't handled correctly.  Don't shove wads of stuffing into your ami.  Take a smallish lump, fluff it to remove any bunched pieces, and pull it so it is a wider, thinner piece.  Place the piece as far into the ami as it can go, spreading the edges to the sides.  Keep doing this, layering the fluffed pieces, until the ami is completely stuffed.
  • If you are making a long, thin piece that you stuffed as you went along (like a snake), it can look lumpy at the end.  Roll the finished piece gently between your palms to even the stuffing out a bit.  This technique can work wonders.
  • Always use invisible decrease so that your finished piece will have a neat and smooth look.  To invisible decrease: when you get to the place where you need to decrease, insert into the front loops only of the next two stitches, yarn over, pull the hook through two loops, yarn over, pull through the remaining two loops.  Invisible Decrease complete!
  • Use pins to fasten pieces together before you start stitching.  This makes it so much easier to get pieces sewn on straight and even!
  • Weaving in loose ends.  There are a lot of tutorials out there - many of them different.  
    What I do in most cases is this:  
    Make sure the tail is sticking out of the wrong side/back of the fabric.  Thread the yarn onto an embroidery needle.  Run the yarn under two to three back loops in a straight line (make sure you don't go all the way through both loops, or it will be visible from the front).   
    Pull the yarn so that it is snug, but not too tight (you don't want to affect the fabric itself or pull gaps between the stitches where stuffing might show through).
    Run the yarn through the next back loop, double back the way you came.  Run the working yarn right through the yarn tail itself, skip the next back loop that you stitched under, and run the working yarn under the next yarn back loops that you used.  You can repeat this step again to make the weave extra secure.  Cut the yarn and you're done!
    When the tails are the result of joining yarn, I double knot the yarn on the wrong side/back of the fabric before weaving in the loose ends.  This keeps the join from loosening and showing later.
    When the tails are the result of a tiny piece having been attached or from embroidery, I double knot the yarn on the wrong side/back of the fabric.  Then, I make a multi-strand simple knot and pull it tightly.  I do not weave in the ends.
  • Many patterns will leave you with a small hole that you'll need to sew closed.  Here's a great explanation from MyGurumi: closing final holes.  
  • Here are two different important techniques for joining pieces:
Do you have a cool trick or tip?  Please share - your comments are always more than welcome!


Here are a few super-cute and free projects - because we all need to keep practicing!  
Happy Monday and happy crocheting!


Crabby from Nareeoo


Little Mermaid from K & J Dolls


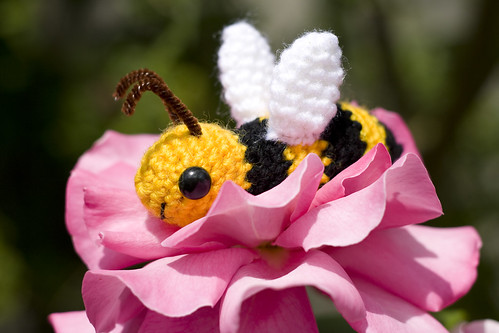
Bee from crochetandknitting.net


A huge thank you to the designers who provided these patterns!

Friday, April 15, 2011

A Grand Day


Even before the Easter Bunny hippity-hops onto the scene, it will be Grandparent's Day - on April 22nd, in fact.  Just enough time to make something cute and yarntastic for someone you love.  But what to make?
Here are some ideas:
  • A favorite animal or pet (use an existing pattern and add personalized features)
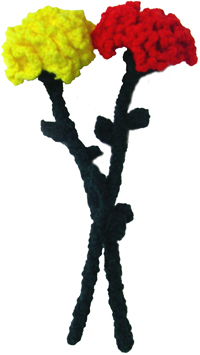
  • A bouquet of yarn flowers
  • A crocheted basket filled with yarn picnic foods (you can be like Little Red Riding Hood)
  • A bowl with crocheted fruits or veggies
  • A doll modeled after each grandchild with a locket & photo
  • A tea cozy
  • A crocheted airplane, train, car, hot air balloon, boat, or other vehicle (customized would be nice)
  • Grill foods
  • Just think what is important to the person - what's in their house, what stories do they tell, what do they love to do
  • And, for those of you with crafty grandparents, perhaps a crochet pattern or book!
And remember - it doesn't have to be your grandparent.  Any grandparent in your life would appreciate being thought of.  So make them feel special on this special day!
Do you have any Grandparent's Day crochet ideas or know of a pattern perfect for the occasion?  Please share - your comments are more than welcome!


And here is a gift from me - a free applique pattern with variations!


Glorious Grands Appliques
Pattern by Katie Christy, Yarnington
Grandma & Grandpa - so great, they're grand!


Head


#
directions
1
hdc 6 into a mc
2
ss, ch 1, hdc into the same st, (2 hdc in each st) X 5, ss into the ch
3
This is a bald head.  You can fo and weave in the loose ends if you’d like.  Or, move on to one of the hair instructions below.

Side Tufts
#
directions
1
ch 2, ss into the same st, join gray yarn
2
ss in the same st, ch 1, ss, sc, join tan yarn
3
ss 3, join gray yarn
4
sc, ss, join tan yarn
5
ch 2, ss in the same st, fo, weave in loose ends

Short Hair
#
directions
1
ch 2, ss into the same st, join gray yarn
2
ss in the same st, (ch 2, ss) X 6 *adjust number of repetitions to customize head shape, more for a rounder head, fewer for an oval head, join tan yarn
3
ch 2, ss in the same st, fo, weave in loose ends

Bun
#
directions
1
ch 2, ss into the same st, join gray yarn
2
ss in the same st, sc, hdc, ss in the same st, dc, tc in the same st, tc in the same st, dc in the same st, ss, hdc in the same st, sc, ss, join tan yarn
3
ch 2, ss in the same st, fo, weave in loose ends

You can also make an additional blank head piece and whip stitch it to the head-with-face piece (with the backs on the inside).  This creates a more finished piece – perfect for gift trimming and many other things!


Please do not sell this pattern or reproduce it in any way.  If you would like to share it, please do not copy & paste, but instead link to this page.  Items made from this pattern are not to be sold under any circumstances.  This is a pattern free for your personal or charitable use only.  Thank you!


Here are some more free patterns for you:


And Happy Early Grandparents Day to any of you out there with your own grandkids!!
Happy crocheting!

Thursday, April 14, 2011

Egg Incognito

Because this Easter, it's either hide or dye...


Free Pattern:


Egg:
1. mc 6
2. (inc, sc) - 9
3. (inc, sc 2) - 12
4. (inc, sc 3) - 15
5. (inc, sc 4) - 18
6. (inc, sc 5) - 21
7. (inc, sc 6) - 24
8-9. (sc) - 24
10. (dec, sc 2) - 18
begin stuffing and continue as you go until the egg is shaped properly and stuffed firmly
11. (dec, sc 2) - 12
12. (dec), fo, leave a long tail for sewing - 6
13. sew over and through the next stitch, stitch under and through the next stitch, continue in this fashion until you have sewn the tail into each open stitch, pull the yarn tight to close the opening, fo, weave in the loose end
14. cut some cool spy shades out of black felt, glue them onto the egg
15. cut a funky trench out of gray felt, glue or stitch down the lapel and collar, glue or stitch onto the egg
16.  now send your egg deep undercover - it's a crack or get cracked world out there...


Here are my templates, but there is a lot of room for improvement :)
The coat should be aprx 1.5" x 5.5"
The glasses should be aprx .25" X 1.25"
Print, clip from paper, pin to felt, cut out
Dotted lines are where to fold


Please do not sell this pattern or reproduce it in any way.  If you would like to share it, please do not copy & paste, but instead link to this page.  Items made from this pattern are not to be sold under any circumstances.  This is a pattern free for your personal or charitable use only.  Thank you!


Wednesday, April 13, 2011

Elusive and Reclusive

You push through the dense forest, trying desperately to hold onto the hope that you'll find your way out.  Surely, a trail will open up, a clearing will appear, salvation will come just around the next bend.  But twist after turn, there is nothing but more gnarled trees blocking your path, more brambles scratching at your legs, more menacing sounds coming from unnamed sources all around you.  And as darkness descends, so do your spirits.
Hours pass...
A thick mantle of clouds drifts across the sky.  The stars wink out, one by one, and finally, the moonlight fades away.
You walk now through the complete blackness of night.  You trip over tree roots, you are raked relentlessly by reaching branches.  You've never been so lost.  So scared.  And worst of all, it has been clear for some time now that something is following you.
You hear it scuffling heavily through the dead leaves and rotting pine needles.  Its breath is ragged.  And it is getting closer.
Something snaps right behind you and you break into a panicked sprint.  You trip.  Fall.  With bloody knees and palms, you heave yourself back up and try to run, but the thing is upon you...
You let yourself fall back to the ground.  You close your eyes tight and curl into a ball.  Your hope is gone.
The thing looms hugely over you now.  You feel the heat of its body.  You smell its earthy, foresty scent - like woodchips and fir cones and mossy soil.  It makes a deep, rumbling, cooing sound and you hear it squat down.  It reaches toward you.
To your utter surprise, you feel the creature ever so gently pet your back.  Its hand is enormous.  It coos again, comfortingly, and pulls you into its arms.  You crack your eyes open and see it.  Can it be?  Are you dreaming?  Can this really be bigfoot?
The creature smiles and you look, fully now, into its deep black eyes.  You know at once that this is no monster.  The creature carries you, moving fast through the trees and the bushes and the boulders.  He keeps going until you have reached a clearing.  And, yes - the road.
He pats your head and coos again before turning and trotting back into the black forest, taking all your fears with him.


Meet the Bigfoot Pals!  Left to right: Bunyip, Sasquatch, and Yeti.  They're available now:
Yarnington on Etsy
Yarnington on Ravelry


Sasquatch: Bigfoot of the forest and mountains
Yeti: Bigfoot of the snow
Bunyip: Bigfoot of Australia


And here are some other woodsy patterns for your perusal:


Thank you to the designers for these awesome patterns!
Happy crocheting!


Monday, April 11, 2011

Wiggle Worm

"The early bird gets the worm. The early worm... gets eaten."
Norman Ralph Augustine


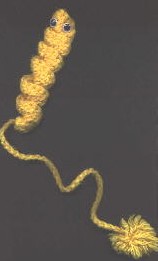
Still on my creepy crawly kick from yesterday, I decided to make an ami earthworm.  But, what would be better?  A more realistic version or something more cute and cuddly?  As it turned out, I didn't have to choose - my worm could be both!  And, thus, Wiggles squirmed into existence!


So, what, you might be asking, is that band around the worm called (I know I was wondering).  Well, it is the clitellum.

Here are some other Worm Fun Facts:

  And here are a few fun and free wormy patterns for your enjoyment:


Happy crocheting and happy Monday!

Sunday, April 10, 2011

All Abuzz

Whether you love the creepy crawlies or run, flailing and screaming from them in terror, it is indisputable that they are super-cute in crochet form!
Though I should have been tackling my to-do list today, I was overwhelmed with the urge to create a caterpillar.  And so, Bobbles found his way into existence!


He's now available in my shops (and comes with a bonus flower & two leaf patterns):
Yarnington on Etsy
Yarnington on Ravelry


I'm thinking that I'll have to add some more friends to this little garden party!  To be continued...
So, of course, once I got on the theme, I had to see what else was out there.  Here are some cute patterns for you to try:


This is my favorite
Kabuto Mushi Beetle from Omura
(please forgive me if I wrote this incorrectly - the site is in Japanese)


Firefly from Planet M Files


Bazzil from Amy's Odyssey


Snail by Tamara Bower-Snow on Roxycraft from For the Love of Yarn


Ladybug from Lion Brand


Spider from Lion Brand


Thank you to the artists that provided these patterns!
Happy crocheting!

Saturday, April 9, 2011

Bok Bok Bok

Let us celebrate the mighty chicken!  So adorable, so quirky and funny, so perfect for springtime!  Here are some clucky fun facts:


Chickens were domesticated about 8000 years ago
Chickens can lay white, brown, blue, green, and pink eggs
Chickens are not capable of sustained flight
Fear of chickens is called Alektorophobia
Chickens can travel up to nine mph
The greatest number of known yolks in an egg is nine
It takes a hen about 24 hrs to lay an egg
It takes about 21 days for a chick to hatch
The chicken is the closest known relative to the T-Rex
Chickens are omnivores
Chickens are fun to crochet!


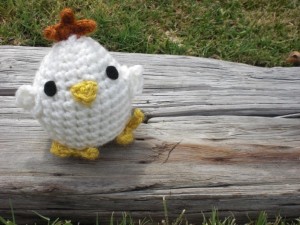
Today I added a new fellow to the ami family.  He's a little chick...mostly.  He is dubbed Bunny Peep.  Actually, he was my husband's idea.  I was working on making a mini hen and it just wasn't happening today.  A suggestion was made and, voila!  Bunny Peep was born.  And here he is:


Yarnington on Etsy
Yarnington on Ravelry


Here are some more...conventional chickies:


And, as always, thank you to the designers!