Showing posts with label applique. Show all posts

Tuesday, October 25, 2011

Itsy Bitsy Spider


Don't be afraid!  These creepy crawlies are friendly!  

Why an applique, you might ask?  Well, the possibilities are many:

    Gift Adornment
   Magnets & Fridgies
   Pins
   Embellishments for anything from hats to bags
   Cute Halloween Favors
   Decorations - make a cluster into a cute garland!
   And...they're just fun to make!


About the Pattern
This pattern is joined at the end of each round.  Each round is started with a chain.  The chain does not count as a stitch.   When you join, you will always join into the stitch just after the chain.
Parentheses indicate a section to be repeated.
Brackets indicate a series of instructions to be worked into the same stitch.


Spider

rd
directions
total
1
mc 6
6
2
[join to the 1st sc of the round, ch 1, sc 2], (inc)
12

Leg: [sc, ch 4, ss in the 2nd ch from the hook, ss 2]
the leg counts as one stitch

3
[join to the 1st sc of the round, ch 1, sc], [sc, leg], leg, [leg 2], sc, inc, inc, sc, [leg 2], leg, [leg, sc], sc, fo, weave in loose ends
18


You can whip stitch two together for a puffier (and more finished) 3D creation.  This results in a piece perfect for gift tags, hanging decorations, and little toys.
Here is the pattern for the back piece:
rd
directions
total
1
mc 6
6
2
[join to the 1st sc of the round, ch 1, sc 2], (inc)
12
3
[join to the 1st sc of the round, ch 1, sc], inc, (sc, inc), fo, leave a long tail for sewing
18
4
Line the back piece up with the front, with the wrong-sides facing each other.  Whip stitch the pieces together, avoiding the legs, and keeping the stitches lined up evenly.  Fo, weave in the loose end.


How you embellish these little guys is totally up to you!  Embroider or add google eyes, beads, or buttons.  Enjoy!

Please do not sell this pattern or reproduce it in any way.  If you would like to share it, please do not copy & paste, but instead link to this page.  Thank you!

Friday, April 15, 2011

A Grand Day


Even before the Easter Bunny hippity-hops onto the scene, it will be Grandparent's Day - on April 22nd, in fact.  Just enough time to make something cute and yarntastic for someone you love.  But what to make?
Here are some ideas:
  • A favorite animal or pet (use an existing pattern and add personalized features)
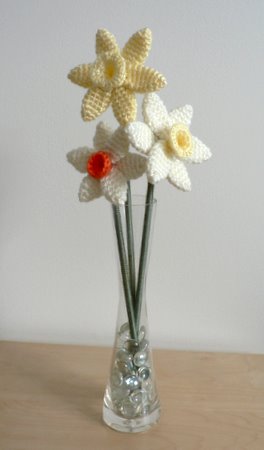
  • A bouquet of yarn flowers
  • A crocheted basket filled with yarn picnic foods (you can be like Little Red Riding Hood)
  • A bowl with crocheted fruits or veggies
  • A doll modeled after each grandchild with a locket & photo
  • A tea cozy
  • A crocheted airplane, train, car, hot air balloon, boat, or other vehicle (customized would be nice)
  • Grill foods
  • Just think what is important to the person - what's in their house, what stories do they tell, what do they love to do
  • And, for those of you with crafty grandparents, perhaps a crochet pattern or book!
And remember - it doesn't have to be your grandparent.  Any grandparent in your life would appreciate being thought of.  So make them feel special on this special day!
Do you have any Grandparent's Day crochet ideas or know of a pattern perfect for the occasion?  Please share - your comments are more than welcome!


And here is a gift from me - a free applique pattern with variations!


Glorious Grands Appliques
Pattern by Katie Christy, Yarnington
Grandma & Grandpa - so great, they're grand!


Head


#
directions
1
hdc 6 into a mc
2
ss, ch 1, hdc into the same st, (2 hdc in each st) X 5, ss into the ch
3
This is a bald head.  You can fo and weave in the loose ends if you’d like.  Or, move on to one of the hair instructions below.

Side Tufts
#
directions
1
ch 2, ss into the same st, join gray yarn
2
ss in the same st, ch 1, ss, sc, join tan yarn
3
ss 3, join gray yarn
4
sc, ss, join tan yarn
5
ch 2, ss in the same st, fo, weave in loose ends

Short Hair
#
directions
1
ch 2, ss into the same st, join gray yarn
2
ss in the same st, (ch 2, ss) X 6 *adjust number of repetitions to customize head shape, more for a rounder head, fewer for an oval head, join tan yarn
3
ch 2, ss in the same st, fo, weave in loose ends

Bun
#
directions
1
ch 2, ss into the same st, join gray yarn
2
ss in the same st, sc, hdc, ss in the same st, dc, tc in the same st, tc in the same st, dc in the same st, ss, hdc in the same st, sc, ss, join tan yarn
3
ch 2, ss in the same st, fo, weave in loose ends

You can also make an additional blank head piece and whip stitch it to the head-with-face piece (with the backs on the inside).  This creates a more finished piece – perfect for gift trimming and many other things!


Please do not sell this pattern or reproduce it in any way.  If you would like to share it, please do not copy & paste, but instead link to this page.  Items made from this pattern are not to be sold under any circumstances.  This is a pattern free for your personal or charitable use only.  Thank you!


Here are some more free patterns for you:


And Happy Early Grandparents Day to any of you out there with your own grandkids!!
Happy crocheting!

Saturday, March 26, 2011

Free Pattern: Applique Fish

Upon taking ownership of Gritty Kitty, my daughter immediately proclaimed a serious need of fish for her new yarn pet. I was short on time and without a pattern.  In the end, and after a lot of trial and error, I had two different styles. They were well received and kitty is appeased...for now.
Here are the patterns - a small and large version of a goldfish and a guppy!


Goldfish:

Small Goldfish:
1. magic circle 6
2. (inc) - 12
3. ss into 1st st of the round
4. chain 8, ss into the same st
5. chain 8, ss into the same st
6. fasten off and weave the loose ends into the back


Large Goldfish:
1. magic circle 6
2. (inc) - 12
3. (inc, sc) - 18
4. ss into 1st st of the round
5. ch 10, ss into the same st
6. ch 10, ss into the same st
7. fasten off and weave the loose ends into the back
*The fish in the pic was crocheted as per the pattern above.  For a more even circle, ss at the end of rd 2, ch 1, and proceed.

Guppy:

Small Guppy:
1. ch 7, ss into the 2nd ch from the hook, hdc, dc, dc, hdc, sc, ch 1
2. working now on the opposite side of the chain, sc, hdc, dc, dc, hdc, ss
3. ch 3, hdc into the 2nd ch from the hook, sc, ss into the same st
4. ch 3, hdc into the 2nd ch from the hook, sc, ss into the same st
5. fasten off and weave in the loose ends
*it is helpful if you can carry the yarn tail in instruction #2

Large Guppy:
1. ch 9, ss into the 2nd ch from the hook, hdc, dc, dc, dc, dc, hdc, sc, ch 1
2. working now on the opposite side of the chain, sc, hdc, dc, dc, dc, dc, hdc, ss
3. ch 3, hdc into the 2nd ch from the hook, sc, ss into the same st
4. ch 3, hdc into the 2nd ch from the hook, sc, ss into the same st
5. fasten off and weave in the loose ends
*it is helpful if you can carry the yarn tail in instruction #2

How you embellish these little guys is totally up to you!  Add google eyes, X eyes, or embroider them however you'd like (like the skeleton fishy).  You can sew two together for a puffier (and more finished) 3D piece.  You can sew them to bags, hats, or whatever you'd like.  Make one, two, or a whole school.  Have fun!

Please do not sell this pattern or reproduce it in any way.  If you would like to share it, please do not copy & paste, but instead link to this page.  Items made from this pattern are not to be sold under any circumstances.  This is a pattern free for your personal or charitable use only.  Thank you!